More photos for Dottie 'cause she wanted to know the stages of the upgrades:
This is version 3 of the cheapy window shades from Temu on the passenger side bedroom awning.
Version 1 the arms disconnected and the whole thing ended up on the roof.
Version 2 the wind ripped the roller ends out of the body and the rollers out of their brackets
Version 3 has the arms cut down and pivot positioned at the half way point so fully rolled up, the arms will fit under the roller. Bungie cord from Bunnings cut to length to create a flexible tie down under the side bin lid .... this one has remained in place for a few mths now, so no more alterations needed till the permanent awning goes up.
Passenger side awning bedroom.jpg
This is the version 5 at least of cheapie awning from Temu on the passenger side front.
Version 1 had thicker hard rubber insert in the roller end of the awning and threaded into the sail track .... first good wind and it was no longer in the sail track

Version 2 had rope threaded through the awning and through the sail track. This sort of solved the awning pulling out of the sail track, but the wind caused the rope to walk its way out of the sail track over a 24 hr period and end up in a heap at the windscreen end
Version 3 and 4 sort of worked, but anchoring down and moving the arm pivot points and arm lengths resulted in not much shade over the battery box area .... and that was the reason for putting it up in the first place

Version 5 had the shade cloth added and this worked to a degree, certainly reduce the heat inside to the point the air con could cope.
Passenger side awning front.jpg
This is version .. lost count actually, of the original awning on the Winnie on the driver side front
The original design was useless in the wind and had to be rolled up. The wind just about always comes from that direction, so alterations were required.
Version 2 had the arm pivot point moved up to about the halfway point between the roller and the awning fully extended. This helped with the wind trying to rip the thing off the side, added a series of ropes and then the bungie cords gave it a bit of flex .... till it snapped the end of one of the arms. Once repaired, the wind could stretch the awning fabric enough for the awning arm to fold down against the side of the body ... so another support arm was added, pool noodles over the inner arms to create a wave in the awning so it didn't become a sail, then the shade cloth completed it to a satisfactory, if not rather ugly, operating condition.
Driver side awning and shade cloth.jpg
Driver side awning mods.jpg
By this time, how it looked wasn't part of the aim, so anchoring the shade cloth at the front was just bungie cord tied to the bullbar

shade cloth over roof.jpg
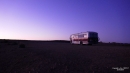
This is the next step. An 18 ft awning on the passenger side and 20 ft awning on the driver side. The plan is for the awning arms to come up about centre of the front windows and extend the mirrors out to maintain rear mirror vision. There are cameras up each side that provide a better view of just what is where in relation to the Winnie body, so the mirrors are really just to meet legal requirements
18ft and 20 ft awning.jpg
You do not have the required permissions to view the files attached to this post.